Category Archives: Holiday Goodies

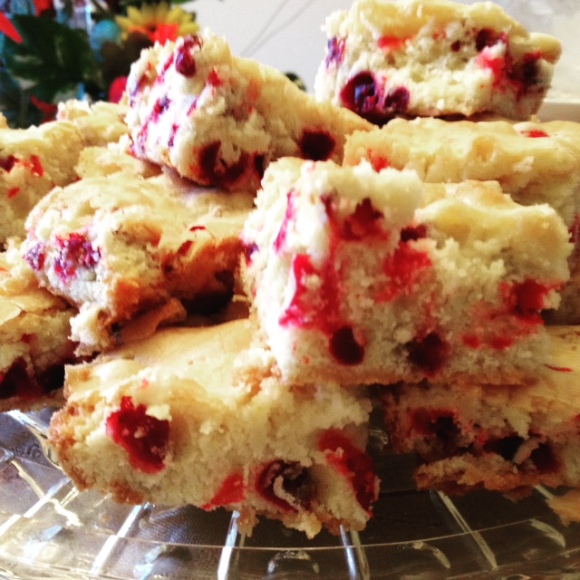
Cranberry Cake Bars

Cranberries are everywhere during this time of year. I’m always so happy to see the first fresh ones popping up in the grocery stores and farmers markets right before Thanksgiving and so sad to see them going away shortly after Christmastime. So during that period I tend to perhaps overdo it a bit on the cranberries. Muffins, bread, salad, pork loin, you name it, it will probably get some cranberries thrown in there somewhere.

This recipe is so easy and doesn’t have any weird ingredients, or very many ingredients at all, in fact. I love it because the bars are just slightly sweet, more of a shortbread sort of taste, and then you get a burst of tangy cranberry in every bite, and it is just heavenly. I’ve made these at least four times so far this season and every time I make them I wish there were more. With so many overly sweet and rich desserts during the holidays these were a refreshing change. We even ate them for breakfast.

I don’t know about you, but a couple of bags of berries will be finding their way into my freezer so I can be enjoying these long after cranberry season is over.

Cranberry Cake Bars

Cranberry Cake Bars

3 eggs
2 cups sugar
3/4 cup butter, softened
1 teaspoon vanilla
2 cups all-purpose flour
12 oz fresh cranberries

Preheat oven to 350 degrees. With a mixer, beat the eggs with the sugar until slightly thickened and light in color, about 5-7 minutes. The mixture should almost double in size. The eggs work as your leavening agent in this recipe, so do not skip this step. This mixture should form a ribbon when you lift the beaters out of the bowl. Add the butter and vanilla; mix two more minutes. Stir in the flour until just combined. Fold in cranberries.

Spread in a buttered 9×13 pan. Bake for 40-50 minutes, or until very lightly browned and a toothpick inserted near the center of the cake comes out clean. Let cool completely before cutting into small squares.
Tagged , , , ,

Pesto Stuffed Cherry Tomatoes

I hardly ever make appetizers since I don’t entertain much and I just don’t think to make appetizers for everyday meals. But when the opportunity presents itself, I love to make little bites of deliciousness. I made these little tomato bites last time I hosted my book club. So simple, so yummy. They didn’t last long!

Obviously making these at the height of summer when the tomatoes and basil are ripe in the garden is the optimal situation. But luckily, cherry tomatoes and basil are available in the store year round and even in the winter, the cherry tomatoes are pretty tasty! I make my own pesto, but any store-bought variety would work as well in a pinch.

Pesto Stuffed Cherry Tomatoes

Pesto Stuffed Cherry Tomatoes

Pesto Stuffed Cherry Tomatoes

Basil pesto (click here for my recipe or you can use whatever pesto floats your boat)
Cherry tomatoes

Cut cherry tomatoes in half. Use a melon baller or spoon to scoop out the tomato guts and discard them. Spoon or pipe in pesto (a ziplock bag with the corner cut off works great for this if you don’t have a piping bag).

And that’s it! You can chill these or leave at room temperature. Refrigerate any leftovers if you have any.


Tagged , , ,

A Few Of My Favorite Things – Holiday Goodies!

A couple of months ago, I teamed up with two of my cousins and we had ourselves a bake-a-thon.  The thought was to finish all of our holiday baking in one fell swoop!  We each came armed with recipes and ingredients for 4-5 things, and we made double batches of everything, which we divided into freezer bags, took home and piled in the freezer to be brought out as needed for holiday parties and such.

Well, as you can imagine, most of it didn’t make it to Christmas.  But it sure was nice to have on hand for company, last minute things to take to a potluck, and family dinners.  And of course, some just called to us in the evenings and had to be eaten.  I was very happy to discover that EVERY SINGLE THING froze beautifully and tasted fresh when thawed out.

Although I have a few things left up in freezer town, I am going to do a little more baking this weekend for Christmas.  So I thought I would put together a few of the recipes I will be pulling from for the holidays, in hopes of helping those of you in need of ideas.  Merry Christmas to each and every one of you out there!

Simply click on each recipe to go to the post.  Any of these will make a wonderful gift or a welcome addition to any holiday party.  Happy baking!

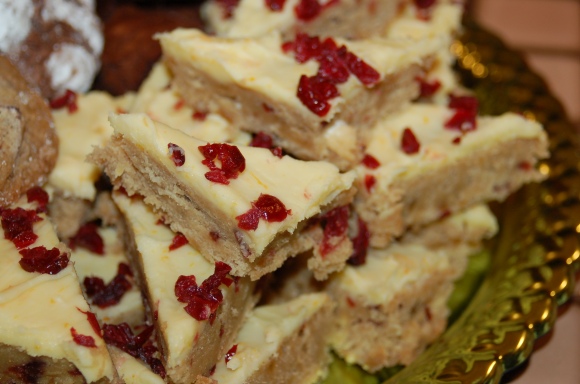
Cranberry Bliss Bars

Rich and indulgent, I love these!

Inside Out Peppermint Patties

Incredibly easy and only a few ingredients!

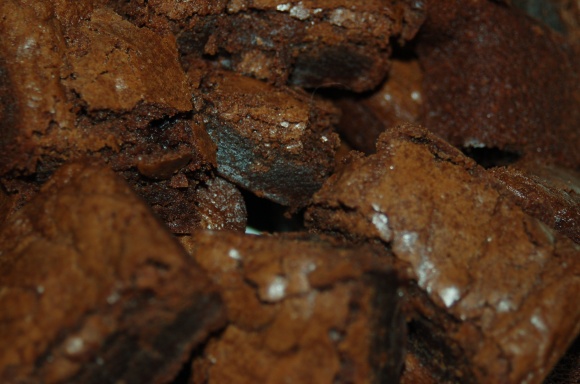
Classic Chocolate Brownies

My go-to foolproof brownies.  I make these all year long.

Chocolate Mint Snow-Top Cookies

Always a holiday favorite.

Flourless Double Chocolate Cookies

Decadent, chewy, and gluten and dairy free (and you won’t miss either one)!

Flourless Chocolate Zucchini Brownies

I know it sounds weird, but these were delicious!  They also come down on the healthier side of holiday treats at a fraction of the calories of regular brownies.

Banana Chocolate Chip Bread

My bumped-up version of banana bread.  So good!

Chocolate Chunk Cookies with a Twist

My favorite cookies, soft, rich, with a twist of orange and cinnamon.

Lemon Zucchini Bread

A delicious twist on an old favorite!

Tagged , , , , , , ,

The Fanciest Apple Cream Pie

A shortbread crust.  Creamy filling.  Flowers made out of apples?  Yep!

Usually for the holidays I try to make something just a little fancy.  So I happened upon a recipe for this fancy pie covered with apple roses!  It looked like a challenge, but it was so pretty I had to make it.  To make it a little more challenging, the recipe was in another language.  Unfortunately the translator didn’t translate very well, and I am far from a master pastry chef, so I took the idea for the roses, and found crust and filling recipes elsewhere, made my own little tweaks, and a pie was born. It was a gorgeous addition to the Thanksgiving feast this year.

My one complaint about this pie is that when I cut into it, it kind of fell apart.  I would have loved to have a perfect little wedge but it didn’t happen.  I think next time I make it I’ll use ramekins and make individual little pies so I don’t have to mess up my fancy flowers!

The Fanciest Apple Cream Pie

The Fanciest Apple Cream Pie

The Fanciest Apple Cream Pie

Crust:

3/4 cup almonds
1/2 cup sugar
1 cup flour
1/2 cup butter, chilled and cut into pieces
1 egg
1 egg yolk
1 tsp. orange zest

Cream:

1/2 cup sugar
2 tbsp. corn starch
3 tbsp. flour
1/2 tsp. salt
2 1/2 cups whole milk
1 egg
2 egg yolks
1 tsp. vanilla
1 tbsp. grand marnier (optional)
1 1/2 tbsp. unsalted butter

3-4 apples
2 tbsp. apricot preserves

Preheat oven to 350°. In a food processor, pulse almonds and sugar until finely ground, being careful to stop before they turn into nut butter. Add flour and salt and pulse to blend. Add butter and pulse until mixture resembles coarse cornmeal. With motor running, add egg, egg yolk, and orange zest and whirl until dough comes together.  Press dough firmly into tart pan or pie pan.  Refrigerate while you make the pastry cream.

To make the pastry cream, in a medium saucepan mix 1/2 cup sugar with 2 tablespoons cornstarch, 3 tablespoons flour, and a pinch salt. Whisk in 2 1/2 cups whole milk, then add 1 large egg and 2 large egg yolks. Whisk until smooth. Place over high heat and stir constantly with a wooden spoon until mixture boils and becomes quite thick, 4 to 6 minutes. Remove from heat and stir in 1 tablespoon vanilla and Grand Marnier, and 1 1/2 tablespoons unsalted butter. Pour mixture into a medium bowl; set bowl in ice water and stir often until pastry cream is cool, about 12 minutes. Pour into crust.  Keep chilled.

Using a vegetable peeler or a paring knife (I had better luck with the knife), cut thin strips from the apples, keeping an edge of peel on them.  The thinner the strips the easier they are to wrap into shapes.

Make a bunch of different sizes, long and short pieces.

Make a bunch of different sizes, long and short pieces.

Roll and wrap apple pieces around each other to make flowers and place on pastry cream, pressing down a bit to hold in place.

Start by rolling a piece into a little circle to make the inner rosebud, then curve short and long "petals" around it to form a flower.

Start by rolling a piece into a little circle to make the inner rosebud, then curve short and long “petals” around it to form a flower.

Continue until entire top of pie is covered with apple roses.  Put apricot preserves in a small bowl and microwave until it melts into liquid.  Brush over the top of apples.

All ready to go in the oven.  Isn't it pretty?

All ready to go in the oven. Isn’t it pretty?

Bake at 350 for 40 minutes.  Let cool on a rack and then chill until ready to serve.  Serve cold.


Tagged , , , , , , , , ,

Herb-Roasted Root Veggies

I’ve been LOVING the fall veggies this year.  That means much experimenting with cooking and combining them in different ways with awesome results!  This is a simple mixture of roasted root veggies that you can mix and match however you’d like.  I used beets, white sweet potatoes and carrots, but if you like something else better (or don’t like some that I used), any root vegetables would work great in this.  I do this all the time with regular potatoes or just carrots, but this is definitely a nice twist.  The sweeter veggies actually caramelize as they cook, making this a sweet and savory treat indeed.  My kids gobbled up huge piles of these.  If you’re looking for an interesting but easy side dish for Thanksgiving, look no further.  These are as gorgeous to look at as they are delicious.

Herb-Roasted Root Veggies.  As beautiful as they are delicious!

Herb-Roasted Root Veggies. As beautiful as they are delicious!

Herb-Roasted Root Veggies

1 large white sweet potato
2 large beets
6 large carrots
Olive oil
Fresh herbs (I used rosemary, thyme and sage), chopped
Salt & pepper

Heat oven to 400˚.  Peel vegetables and chop into similar size pieces (about the size of a french fry).  Lay out on a baking sheet and drizzle with olive oil.  Scatter herbs on top, add a dash of kosher salt and a few grinds of pepper.  Toss about with your fingers and spread out evenly.

All ready to roast.  Minimal tossing will prevent the beets from turning everything pink.

All ready to roast. Minimal tossing will prevent the beets from turning everything pink.

Roast for 30-40 minutes, stirring once about halfway through.  Veggies are done when they are tender and starting to brown on the edges.  Serves 4.

Tagged , , , , , , ,

Flourless Chocolate Zucchini Brownies

In my quest to use up a massive amount of zucchini given to me this summer I came across this gem of a recipe.

I have to say when it comes to baked goods, I’ve never been the biggest fan of the gluten-free, no flour, no sugar, no butter (no good stuff!) variety.  While there are some good recipes out there, most of them just can’t hold a candle to the real thing…in my humble opinion.  Now if you’re on a special diet and you have to go there, I understand but otherwise?  Why bother?  This recipe is worth bothering.  It’s every bit as good as something that has the sugar, butter and flour.  The fact that one of these brownies is just a fraction of the calories of a regular one AND are gluten-free just makes them easier to justify.  But the real reason to make them is because they are delicious!  And if you ask me, that’s the main reason for making dessert to begin with, am I right?

The original recipe only called for 1/2 cup of chocolate chips, and you can use that amount if you want.  I am a chocolate fanatic so I doubled it, and used the big bittersweet ones.  Fabulous!

Fudgy, delicious, and good for you?  Yep!

Fudgy, delicious, and good for you? Yep!

Flourless Chocolate Zucchini Brownies
(slightly adapted from ambitiouskitchen.com)

1/2 cup all natural unsalted peanut butter
1/4 cup honey
1/2 cup unsweetened natural applesauce
1 teaspoon vanilla
1/2 cup unsweetened cocoa powder
3/4 cup oats
1 teaspoon baking soda
1/4 teaspoon salt
1 1/2 cups shredded zucchini
1 cup dark chocolate chips, divided

Preheat oven to 350 degrees. Spray 8×11 baking pan (or an ultimate brownie pan!) with nonstick cooking spray.

Place oats in blender or food processor and process until finely ground. Don’t worry, it doesn’t need to be perfect but it should take a few minutes. Mine still had some whole oats and pieces mixed in with the ground stuff.  Worked fine.  Set aside.

In a large bowl of electric mixer, cream together peanut butter, applesauce, honey and vanilla until smooth. Add in zucchini, cocoa powder, ground oats, baking soda, and salt; mix until well combined. Gently fold in 1/2 cup of chocolate chips. Pour batter into prepared baking pan and sprinkle remaining chocolate chips over the top. Bake for 25-30 minutes or until tooth pick inserted into middle comes out almost clean.

Cool brownies on wire rack then cut into squares. Yum!

Cooling brownies.  I used my ultimate brownie pan (gift from my dear sister) so all my brownies have edges!  The edges are my favorite part.

Cooling brownies. I used my ultimate brownie pan (gift from my dear sister) so all my brownies have edges! The edges are my favorite part.

Tagged , , , , , , , ,

Shark Tale

Most people who have eaten at my table know that while I love to cook, I don’t really get into fancy presentation.  If it looks good and tastes good, that is enough for me.  You can keep your radish roses and curlicues and edible flowers.

But every once in a while, a special occasion calls for a little extra effort.  This is where I usually find a fun project that I’ve been dying to try and give it a go.  Recently for my aunt’s birthday, my mom threw her a luau-themed party.  Now, I’m not Hawaiian (note pasty pale skin and no dance moves), so I’m guessing this is not part of any authentic luau menu, but I thought the occasion called for a shark.

I like carving things.  At Halloween I’m the first to dive into the pumpkins (even before I had kids).  In art school I did all sorts of damage to myself carving linoleum blocks for printing.  Getting creative with carving is just plain fun.  And so…when I saw a photo of a watermelon shark, I knew it was going to happen at some point.

I know this looks fancy, but in reality, it was pretty easy to pull off!  You don’t have to be a master carver by any means. Give it a try and impress all your friends.

Shark!

Shark!

Watermelon Shark with Fruit Salad

Watermelon – go for longer oval shape rather than round
Pineapple
Grapes
Blueberry or chocolate chip

Slice off a small wedge at one end at an angle, so when you sit it on the flat part it leans a bit to one side.  Save the wedge – you’ll use it to cut a piece for the fin later.

Cut a big V shape out for the mouth.  One edge of the V is almost straight up, the other at a low angle – chomp!

Dig out all the watermelon flesh.  I did this by cutting around the inside edge and then slicing and scooping with a big spoon.  Then use the spoon or knife to scrape close to the sides (not all that different from cleaning a pumpkin but quite a bit easier).  It doesn’t have to be perfect, but it’s nice to get all the edible stuff out so it can be eaten.  If you have loads of time, you can use a melon baller to do this, but I went more down and dirty and just hacked it all into bite sized chunks.  Set those aside.

Now you should have a watermelon shell with a big mouth cut in it and a hole in the bottom.  Good job!  Now take a small, sharp knife and score around the mouth about a half-inch or so from the edge all the way around.  Using the knife, cut away ONLY the green skin, leaving the white rind exposed.

Go slowly and slice off only the green outer layer.  If you score your outer line first it's easy to get a nice clean edge.

Go slowly and slice off only the green outer layer. If you score your outer line first it’s easy to get a nice clean edge.

Cut teeth out of the rind.  Very scary!

Close up of teeth carving.

Close up of teeth carving.

Carve a little diamond shape for the eye, inserting a blueberry or chocolate chip for the eyeball.  Cut a fin shape out of a piece of the rind you cut off.  I cut a little hole in the back of the shark and inserted it there so it would stay put.  Or you could use toothpicks to hold it in place if you prefer.

And here's your empty shark vessel.  Fill with fruit salad and wow all your friends!

And here’s your empty shark vessel. Fill with fruit salad and wow all your friends!

Chop up pineapple and de-stem grapes. Toss with the watermelon chunks and fill your shark.  Surround shark with fruit salad on the plate for a pretty presentation and you’re good to go!  You did it!


Tagged , , , , , ,

Herb Roasted Turkey

When I lived in the middle of the country, far away from my family, I cooked Thanksgiving dinner most years for my own little family and in-laws.  And although many people complain about such a task, I always loved it.  I enjoyed having people enjoying my food, and of course when you’re the cook, you get all your favorite dishes. 🙂  Now, I’m back in the Pacific Northwest, surrounded by family and thrilled to be here.  But since Thanksgiving is no longer at my house, I’ve found that I rarely cook turkey.  Which is a shame, because it’s pretty darn good.  And it’s not just for Thanksgiving.

I had a turkey in my freezer that I bought around Thanksgiving when it was on sale.  I decided there was nothing wrong with eating turkey in springtime so I roasted that sucker the other day.  The rest of the meal did not resemble Thanksgiving, since eating like that should definitely be limited to once a year.  But this is pretty much how I cook turkey for any occasion.  What leftovers don’t end up on a sandwich the next day get packed in ziplock bags in my freezer to be used in soups, pot pies and whatever else.

Everybody has their favorite method for cooking turkey.  Some brine, some smoke, some deep fry.  I am a huge fan of roasting bags.  They reduce the cooking time and always yield a perfectly roasted, juicy turkey.  Plus they make clean up a snap.

Herb-Roasted Turkey

Herb Roasted Turkey

Herb Roasted Turkey

1 whole turkey
1/2 stick butter, softened
2 tbsp olive oil
2-3 tbsp. fresh rosemary
2-3 tbsp. fresh sage
2-3 tbsp. fresh thyme
Salt & pepper
Roasting bag – turkey size
1 tsp. flour

Preheat oven to 350˚.  Finely chop all herbs.  In a small bowl mash together the butter, olive oil, and chopped herbs, along with a pinch of salt & pepper.  Set aside.

Butter & herb mixture.

Butter & herb mixture.

Get out a turkey size cooking bag (I use the Reynolds bags) and lay it in a large roasting pan.  The directions on the bag say to add a spoonful of flour to the bag so I always do, although I’m not sure if it’s actually necessary.  I figure it just contributes to the good gravy in the end.  If you’re gluten-free you can probably skip it or use gluten-free flour.  Place the turkey in the bag.  Using your hands, loosen the skin over the breast and drumsticks, wherever you can reach.  Be gentle, and try not to tear the skin.  Rub the butter and herb mixture under the skin and all over the outside of the turkey as well.  I usually add another few grinds of salt & pepper on the outside as well.

Don't be shy, get that butter and herb mixture all over under and over the skin for maximum flavor.

Don’t be shy, get that butter and herb mixture all over under and over the skin for maximum flavor.

Seal bag and tuck end down into the pan.  Cut a couple of small slits in the bag so steam can escape.  Cook according to the bag instructions.  For my turkey (14 pounds, unstuffed), this meant 2 – 2 1/2 hours, until a meat thermometer in the thigh hits 180˚.  Then take it out and let it rest at least 20 minutes.  This is an important step, do not skip it!  Letting the turkey rest will result in a more juicy bird.  I use this time to make gravy, mash the potatoes, make the salad, etc.

To make gravy, cut off one corner of the cooking bag and drain turkey juice into a saucepan.  Mix up a bit of water or milk with a few tablespoons of cornstarch.  Bring liquid to a boil, then whisk in cornstarch mixture.  Taste and add salt & pepper if needed.  Serve with turkey (and mashed potatoes of course!).

Tagged , , , , ,

Cranberry Bliss Creme

Cranberries always make me think of Christmas, because that’s usually when I cook with them.  I have a lovely cranberry chocolate chip bread that is one of my seasonal favorites.  But that post is for another day.  Fresh cranberries are actually available all winter and you can get frozen ones year round (which could easily be substituted in this recipe). I love those tangy little things so I’m trying to take advantage of them a little more often.

This recipe was actually called Cranberry Curd, but whenever I hear the word “curd” my gag reflex immediately reacts.  Not a big fan of curds of any kind.  They make me think of things that are sour and gross.  Which admittedly, is not always the case.  But seriously, I never even knew what a curd was in this context.  I’ve heard of lemon curd but I always avoided it, picturing some cottage cheese-infested lemony concoction.  I was wrong.  A curd is simply a creamy fruit spread made with eggs.  It can be used in place of jam, on toast, on yogurt, for filling in cake…you get the idea.  It was sweet, tangy and wonderful!

Just use instead of jam. I especially liked it on sourdough.  Yum!

Just use instead of jam. I especially liked it on sourdough. Yum!

I made up a bunch of this during the holidays.  It was the perfect item to finish off a gift basket, present to a hostess, or offer as a token gift or thank you.  And we managed to keep and eat quite a bit of it ourselves.  I loved it on toast, but my favorite way to eat it was swirled into greek yogurt.

This is how most of mine ended up.  Swirled into thick plain or honey greek yogurt. Delicious and healthy too!

This is how most of mine ended up. Swirled into thick plain or honey greek yogurt. Delicious and healthy too!

I packaged it in small jam jars, which were great to put in the freezer and take out as needed.  The only drawback to this particular item is that it doesn’t last long!  With an expiration date of 2 weeks or so, you can’t stash it in the fridge and forget about it.  So cook some, and eat up!

Jars of Bliss to give out.  And a few to keep for myself.

Jars of Bliss to give out. And a few to keep for myself.

Cranberry Bliss Creme
(from Cooking Light.  Recipe makes about 2 1/2 cups, but can be easily doubled.  Allow a little extra time for the curd to thicken)

1/2 cup water
2 tbsp. fresh lemon juice
1 (12 oz) package of fresh cranberries
2/3 cup granulated sugar
1/4 cup packed brown sugar
2 tbsp. unsalted butter, softened
2 large egg yoks
1 large egg
1 1/2 tsp. cornstarch
1/8 tsp. salt
1 tbsp. Grand Marnier (optional)

Combine water, lemon juice and cranberries in a medium saucepan.  Bring to a boil.  Reduce heat and simmer 5 minutes or until cranberries pop.  Place cranberry mixture in a blender or food processor.  Process until smooth.  Strain through a fine sieve over a bowl and discard solids.

Combine sugars and butter in a bowl.  Beat with a mixer at medium speed until well combined.  Add egg yolks and egg, 1 at a time, beating well after each addition.  Stir in cranberry mixture, cornstarch, and salt.  Place mixture in the top of a double boiler.  Cook over simmering water until a thermometer registers 160˚ and mixture thickens (about 10 minutes), stirring frequently.  Remove from heat, let stand 5 minutes.  Stir in liqueur.  Cover and refrigerate.  Use within 2 weeks.

Perfect paired with something savory like Individual Mushroom Quiche.

Perfect paired with something savory like Individual Mushroom & Feta Quiche.

Tagged , , , , , , , , , , ,

April’s Chocolate Chunk Cookies

I don’t have any cookies in my house at the moment.  If I had them, I would eat them.  I have no self-control when it comes to cookies.  So I don’t make them often.  When I do, they do a very quick disappearing act, because they are (if I do say so myself) spectacular.

These are one of my favorite cookies to make.  My little spin on your basic chocolate chip cookie.  I used to use half butter and half margarine or butter flavored crisco to make them a little fluffier.  But these days, I’m using less and less “fake” food, which margarine is in my book (did you know it’s chemically very similar to plastic?) so now I use all butter.  I think they taste better, but they do tend to come out a bit more flat.  I don’t really have a problem with that, although they are not quite as pretty.  But they still taste wonderful and I would happily sit down and eat a whole plate of them, were they here.  It might be time to bake another batch.

Right now, I’m craving a cookie.

A stack of cookie love.

A stack of cookie love.

April’s Chocolate Chunk Cookies

2 1/4 cup flour
1 tsp. baking soda
1 tsp. salt
1/2 tsp. cinnamon
1 cup butter (2 sticks, slightly softened)
3/4 cup sugar
3/4 cup brown sugar
1 tsp. finely grated orange rind
1 tsp. vanilla
2 eggs
6 squares Bakers bittersweet chocolate, chopped up
1/2 – 1 cup walnuts (optional)

Preheat oven to 375˚.  Combine dry ingredients (flour, baking soda, salt & cinnamon) in a small bowl.  Set aside.  In a large bowl beat or stir butter, sugar and brown sugar until creamy.  Add eggs, vanilla, and orange rind.  Beat until combined.  Gradually beat or stir in flour mixture about 1/3 at a time.  Fold in chocolate and nuts.

Chopped bittersweet or semi sweet chocolate.  You could use chocolate chips if you want, but I love how you get varying sizes of chocolate bits with this method.  Some big chunks, some tiny slivers, and a little chocolate dust to flavor the dough.

Chopped bittersweet or semi sweet chocolate. You could use chocolate chips if you want, but I love how you get varying sizes of chocolate bits with this method. Big chunks, tiny slivers, and a little chocolate dust to permeate the dough.

Drop by spoonfuls onto an ungreased baking sheet.  If you prefer you can line your baking sheets with parchment for easier cleanup.  Bake 8-10 minutes until just barely brown around the edges.  Remove from oven.  Using a spatula, transfer cookies to wax paper or cooling racks to cool.  Try not to eat them all at once.

The perfect addition to any tray of treats.

The perfect addition to any tray of treats.


Tagged , , , , , , , , ,