I have no intention of giving up dessert. That being said, I am trying to eat healthier (most days anyway). So I occasionally attempt a lighter dessert in my efforts to be good. Sometimes you get pretty much what you’d expect. Something okay. Something less. Less satisfying. Less tasty. Less what you were craving.
But sometimes you get a surprise. A tasty, wonderful surprise. That something “lighter” is still delicious and crave-worthy. It stands on its own as a dessert and yells “EAT ME!”
These little beauties pass the dessert test in my book. I love cheesecake but it’s about one of the most evil desserts on the planet. These soufflés taste like a fluffy, delicate cheesecake cloud and are absolutely delightful. And at about 140 calories each (vs. 500-800 calories for a slice of cheesecake), you don’t even have to feel guilty about it.
For the most impressive presentation serve immediately, as soon as they come out of the oven. They start to fall as they cool but no worries! Even if they do, they are mouth-watering. You can also eat them the next day, although don’t be alarmed if they are about half their original size.

Greek Yogurt Soufflé
Greek Yogurt Soufflé
(from julesfood.blogspot.com)
1 cup greek yogurt (original plain)
3 eggs, separated
3 tbsp. flour
1/8 tsp. salt
1 tsp. vanilla extract
1/8 tsp. cream of tartar
1/4 cup sugar
a little butter and sugar for prepping the ramekins
Berries and/or lemon zest for garnish
Preheat your oven to 375˚. Rub the inside of each of 6 ramekins with a very light coating of butter. Sprinkle some sugar in there and swirl it around to coat the surface. Dump out any excess sugar. Place prepared ramekins on a baking sheet.
In a large mixing bowl whisk together yogurt, egg yolks, flour, salt and vanilla. Set aside. In another bowl, beat the egg whites and cream of tartar until foamy. Gradually add the sugar and continue to whisk or beat until soft peaks form.

This is about what they looked like right before I mixed them together.
Add 1/3 of the egg white mixture to the yogurt mixture and incorporate well. Add in another 1/3 of the mixture and carefully fold it in, then do the last of the mixture. You don’t want to mix too much, just fold until incorporated; you want to retain as much volume as possible.
Divide among your ramekins, filling about to the line (at least on the ones I have).

I use 8 oz. ramekins and this is how full they were. A 6 oz. ramekin would probably work fine as well.
Bake for 15 minutes. Do not open the door to peek! They should be lightly browned and puffed up nicely. Remove from oven, garnish and serve immediately for the full effect! They will begin dropping as they cool. No worries, they will still be delicious, but not quite as impressive after they’ve fallen.
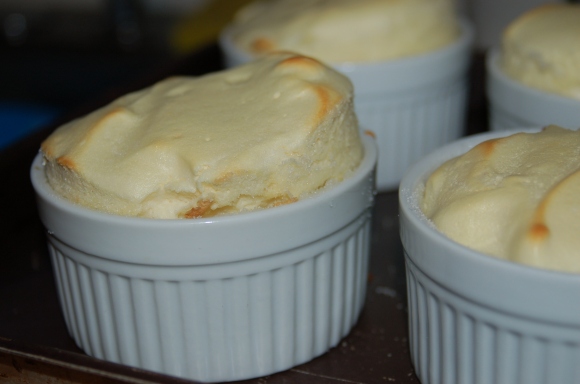
Just out of the oven. Serve right away!

Already starting to fall a bit after about 10 minutes, but still sooo good.