Monthly Archives: February 2013

Asian-Inspired Pork Loin and Slaw

I love mixing marinades.  I always feel like a mad scientist, tossing in a bit of this and a dash of that.  Rarely measuring.  One of the nice unexpected benefits to blogging is that it has forced me to write down what I do and how much I do it with, which has made it possible to reproduce good results.

I actually started out with the makings for an Asian slaw, and needed something to go with it, so I decided to go with an Asian(ish) pork loin.  I honestly have no idea if they would ever make it like this in Asia, but the flavors have a distinctive Asian twist so we’ll just roll with it.  When you have a well-stocked pantry, you can pretend you’re from anywhere, right?  Normally I would do these two dishes in two separate posts but they went together so well, I thought I’d just throw it out there together.

I never used to be a huge fan of pork, but I absolutely adore pork loin.  It’s lean, but juicy and it soaks up just about any marinade you put on it and just gets tastier.  And they are just about foolproof to cook.  Depending on where you shop, sometimes they are a little pricey, but I keep my eye out for sales, and when I see one I stash a few in my freezer.

Asian-Inspired Pork Loin and Slaw

Asian-Inspired Pork Loin and Slaw

Asian-ish Pork Loin

1/4 cup hoisin sauce
2-3 tbsp. soy sauce
1 tsp. sesame oil
1 tbsp. chili garlic sauce
2 tbsp. balsamic vinegar
1-2 pork loins (1 package usually has 2 loins in it)

Mix together marinade all ingredients in a large zip lock bag, then add pork loin.  Marinate at least 30 minutes or up to a couple of hours.

My favorite way to marinate since it's easy to reposition so all of the meat gets some love.  You can do it in a dish or bowl if you prefer.

My favorite way to marinate since it’s easy to reposition so all of the meat gets some love. You can do it in a dish or bowl if you prefer.

Preheat oven to 350˚.  Place loin in a shallow baking dish and bake for 40 minutes, brushing once or twice during cooking with leftover marinade (do not brush with marinade during the last 5 minutes of cooking). It should be done, but if you want to test it, a meat thermometer should read 145˚ in the center of the loin.  Remove from oven and let rest 5 minutes before slicing.  It should be slightly pink in the center.

Juicy wonderful pork loin.

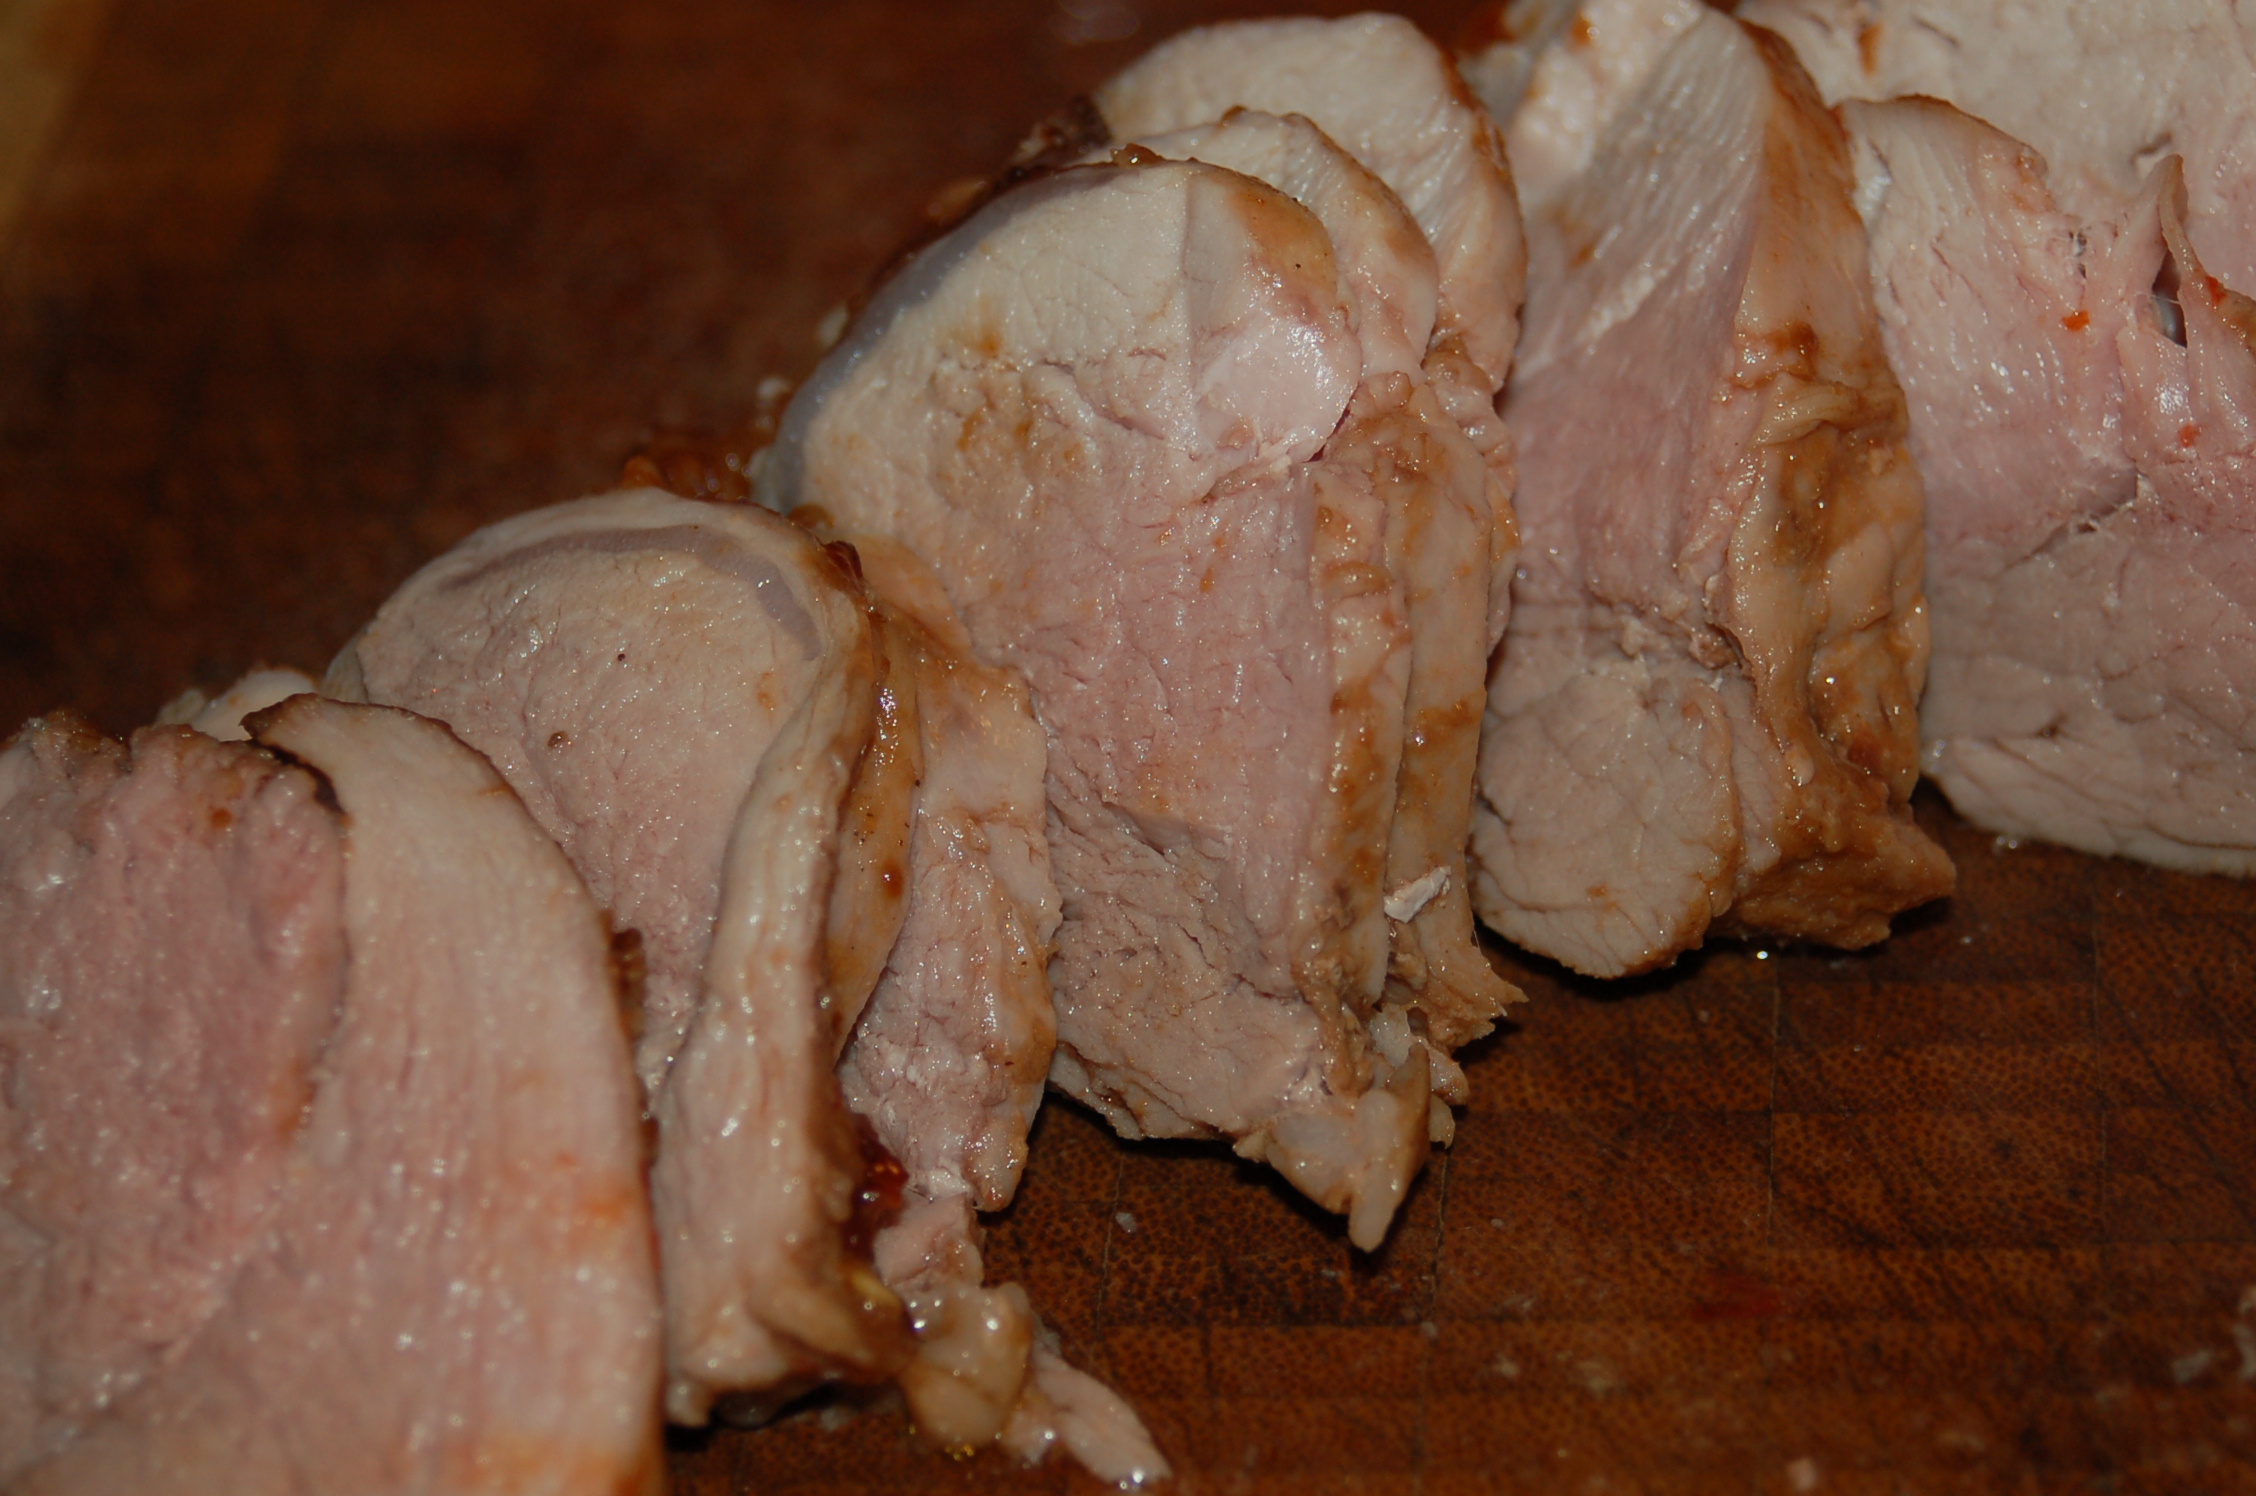
Juicy wonderful pork loin.  Best when it’s slightly pink in the center.

Asian Slaw

1 small head Napa cabbage, thinly sliced
1/2 bell pepper, chopped or sliced
2 carrots, shredded
2 green onions, sliced
3 tbsp. rice vinegar
1 tbsp. lime juice
1 tbsp. soy sauce
1 tsp. sesame oil
1 tsp. sesame seeds
1/2 tsp. crushed red pepper

Mix all ingredients.  I recommend letting it sit for at least 30 minutes, stirring occasionally, before serving so flavors can mingle.

Tagged , , , , , , , , , ,

Chewy Gooey Granola Bars

I got a speeding ticket this morning.  And broke a nail.  One might suppose that this was the start to a rough day.  But I’m sitting here munching on a fabulous granola bar, one that transcends most granola bars as we know them.  And drinking a perfect mocha.  And watching a few rays of sun breaking through the clouds as I get ready to head to yoga class.  And I’m thinking life is pretty darn good.

I found this recipe on one of my favorite blogs and thought, “oh those look good, and healthy too!”  And then when I was making them I thought, “hey, what if I add a cup of mini chocolate chips to them?” So…maybe mine are a little less healthy.  But you could still do worse.  I made some changes in the original recipe, based mostly on what was in my cupboard and a few flights of fancy.  And was also reminded that you should always read the recipe all the way through before starting.  My mini chocolate chips seemed like an inspired idea until I realized I would be pouring hot liquid on the mixture.  Um. I didn’t really think that through.  My chips melted.  Which really turned out to be wonderful, since the chocolate permeated the bars rather than staying in chip form.  It was unanticipated but quite delicious, and a contributing factor in the “gooey” description to be sure.  The end result is a chewy, gooey, indulgent (and still somewhat healthy) treat.  So take a moment, slow down, and eat one.

Chewy Gooey Granola Bars

Chewy Gooey Granola Bars

Chewy Gooey Granola Bars
(adapted from Chewy Cherry Granola Bars by Canyoustayfordinner.com)

2 cups rolled oats
1 cup sliced almonds
1 cup puffed rice (or Kashi 7 Whole Grain Puffs, which I happened to have)
1 cup dried cranberries
1 cup mini chocolate chips
1 tbsp. butter
1/2 cup honey
1/4 cup maple syrup
3 tbsp. brown sugar
1 tsp. vanilla extract
1/4 tsp. almond extract
1/2 tsp. kosher salt

Heat oven to 350˚.  Spread oats out on a cookie sheet and toast in the oven for about 10 minutes, stirring occasionally, until lightly browned.  In a large bowl, stir together oats, almonds, puffed grain or rice, cranberries, and chocolate chips.  Lower oven temp to 300˚.

In a small saucepan, combine butter, honey, maple syrup, brown sugar, vanilla extract, almond extract and salt.  Bring to a boil, cook and stir one minute.  Remove from heat and pour over grain and fruit mixture.  Mix well until all ingredients are combined.  Line a 13 x 9 baking dish with foil and spray with cooking spray.  Put mixture in the pan.  Wet fingers and press evenly and firmly into the pan.  Bake at 300˚ for 20-25 minutes.  Cool at least 2-3 hours (I know!  But seriously, you need to wait) before cutting into bars.  Cut into bars and store in airtight containers, using wax paper to separate the bars so they don’t stick together.  Makes 24 bars.  187 calories per bar.

A giant granola bar (or 24 smaller granola bars)

A giant granola bar (or 24 smaller granola bars)

Tagged , , , , ,

Indian Spiced Lamb & Lentil Stew

My love of Indian food and my love of soup have finally found each other.

My daughter came home from school yesterday and immediately moaned in delight because our house smelled so wonderful.  And who could blame her?  I was doing the same thing myself.

I came across this gem of a recipe in Cooking Light and almost skipped over it because it just didn’t look very exciting.  But the flavor (and the amazing aroma) was outstanding.  The original recipe calls for only 6 oz. of lamb but the package I bought was a pound so I just decided to double the recipe and have leftovers.  An excellent decision!  Other than the lamb everything else on the list was stuff I normally have in my cupboard or fridge, so I’m sure this will land in my pile of go-to recipes I use when there is “nothing” to cook.  I’m already looking forward to making it again.

Indian-Spiced Lamb & Lentil Stew

Indian-Spiced Lamb & Lentil Stew

Indian Spiced Lamb & Lentil Stew
(adapted from Cooking Light)

1 pound ground lamb
2 tsp. red curry powder (I used Madras curry powder since I had it)
2 tsp. cumin
1 tsp. salt
1/2 tsp. ground cayenne pepper
2 cups chopped onion
1 1/2 cups chopped carrots
1 jalapeno pepper, finely chopped
6 garlic cloves, minced
2 tbsp. tomato paste
1 1/2 cups dry brown lentils
4 cups chicken broth
2 cups water
1 can coconut milk
1 can diced tomatoes with juice
Plain Greek yogurt for garnish
Cilantro for garnish

Drizzle a bit of olive oil in your soup pot and add lamb, stirring to break up.  Add curry powder, cumin, salt & cayenne pepper.  Cook for a few minutes.  Add onions, carrots and jalapeno.  Continue to cook, stirring occasionally for 4-5 minutes until lamb is browned.  Add garlic and cook another minute.  Add tomato paste, stir well and cook another minute.  Add lentils and stir well, then add broth, water, coconut milk and tomatoes.  Bring to a boil.  Reduce heat and simmer uncovered for about 40 minutes, until lentils are tender.  Taste and adjust seasonings if needed (I added a bit more salt).  Serve topped with a dollop of yogurt and a sprinkle of chopped cilantro.  Serves 6-8.

Tagged , , , , , , , , , ,

Creamy Baked Potato Soup

I rarely eat leftovers in the same form as they were first presented as dinner.  I don’t know if this is some sort of culinary ADD or what, but I just get bored eating the same thing over and over again.  Does anybody else experience this?

Leftover baked potatoes were staring at me and I had eaten baked potatoes the night before, so I decided to do something different with them.  Following the path of many a leftover in my house, they became soup.  But not just any soup.  Wonderful, creamy, delightful baked potato soup.  It will take the chill off, it will cure what ails you, it will just make your tummy happy.  And best of all, since the potatoes are already cooked, it’s a snap to throw together.

Creamy Baked Potato Soup

Creamy Baked Potato Soup

Creamy Baked Potato Soup

1 onion, chopped
3 carrots, sliced or chopped
1 red bell pepper, chopped
2-3 giant baked potatoes (3-4 cups cubed potato)
4 cups milk (I used 1% but any kind will do)
2 oz. cream cheese
1/2 stick butter (1/4 cup)
1 tsp. dill
Salt & pepper (start with 1 tsp. of each and add more if needed)
For garnish – crispy bacon, grated cheese and/or minced parsley

In a soup pot, sauté onion, carrots, and red pepper in a little oil or butter until tender.  Add potatoes and milk.  Heat until it just barely starts to boil, then immediately turn down to a simmer.  Add cream cheese, butter, dill and salt & pepper. Simmer 10-15 minutes, stirring occasionally, to make sure veggies are all cooked through and to let flavors blend.  Using a stick blender or potato masher, mash up or puree the soup, leaving some chunks (you can skip this if you want a chunkier soup).  I leave mine a little chunky but mashing some of it gives a nice texture and thickness that I personally like.  Do a little at a time and stop when it looks good to you.  Taste and adjust seasonings if needed.  Top with your favorite garnish and eat.


Tagged , , , , , , , ,

An Anniversary and a Potsticker

Today marks a year since I started this blog.  It started with Project Veggie, our month-long journey of exploring vegetarianism.  Although we ultimately decided to keep eating meat, it did result in more mindful eating, a lean toward more healthy food and a focus on whole and natural foods and less processed crap.  Claire, age 12, has become quite the little cook, and Luke, age 17, has become even more adept at eating our creations.  This blog now has about 70 subscribers (yay!), and has been viewed more than 7000 times!  I’ll admit to getting a little thrill when people tell me they’re reading it, or sharing it, or cooking from it.  Very cool, folks.

In short, thanks for reading.  I hope you continue to do so.  Keep cooking, and eat your veggies.  And I’ll keep pelting you with new recipes.  And that’s enough blabbering on about THAT.

In my quest to find the perfect potsticker recipe, I tried a new one the other day.  I’m coming to the conclusion that there is no potsticker I don’t like.  These were wonderful.

Chicken Lemongrass Potstickers

Chicken Lemongrass Potstickers

Chicken Lemongrass Potstickers
(adapted from Food & Wine)

1 pound ground chicken
1 cup finely sliced or shredded napa cabbage
1/4 cup chopped cilantro
1/2 cup shiitake mushrooms, finely chopped
2 tbsp. finely grated lemongrass (2 stalks)
2 tbsp. minced chives
1 tbsp. fresh ginger, minced or grated
1 garlic clove, minced
1 egg
1 tsp. salt
Canola oil for cooking
1-2 pkg. gyoza wrappers

Ponzu Dipping Sauce

1 tbsp. chopped green onions
3 tbsp. fresh lemon or lime juice
2 tbsp. mirin
2 tbsp. soy sauce
1 tsp. brown sugar
1/4 tsp. crushed red pepper
1/4 tsp. garlic chile sauce
1/4 tsp. fish sauce

Mix all potsticker ingredients in a bowl (other than gyoza wrappers and oil).  Line two baking sheets with wax paper.  On a lightly floured surface (or surface lined with wax paper), lay out gyoza wrappers a few at a time.  Place 1 tbsp. filling in the center of each one.

Making potstickers.  Not too much filling, you want to be able to seal them well without it squishing out the edges.

Making potstickers. Not too much filling, you want to be able to seal them well without it squishing out the edges.

Dab around the edge with a bit of water.  Lift edges on both sides to meet at the top in the center and crimp together, making a good seal.  Set on the baking sheet, flattening a bit on the bottom.

Ready to cook. If you want to freeze any of these for another day, stop here and freeze, then store in zip lock bags.

Ready to cook. If you want to freeze any of these for another day, stop here and freeze on the tray, then store in freezer bags.  This recipe made two trays like this.

In a large frying pan, heat 2 tbsp. of canola or vegetable oil over medium high heat.  To test to see if it’s hot enough, flick a few drops of water in the pan.  If they sizzle, you’re good to go. Working in batches, set dumplings in the pan, leaving a bit of space between each one.  Cook about 2 minutes, until bottoms are brown.  Add 1/4 cup of water to the pan and cover.  Cook about 4-5 minutes more, until water evaporates.  Remove from pan and enjoy hot.

NOTE:  If you want to freeze part of these, make them up (but don’t cook them), set them on a cookie sheet and freeze.  Once frozen, you can put them in a freezer bag.  To cook, DO NOT THAW FIRST.  Just heat the oil as above, set frozen potstickers in the pan, cook a few minutes on the bottom, add 1/2 cup water, cover and steam until water evaporates, 5-7 minutes.

I served these with sautéed string beans and sesame noodles with ponzu sauce for dipping.

Chicken Lemongrass Potstickers with Sesame Noodles and String Beans

Chicken Lemongrass Potstickers with Sesame Noodles and String Beans

Tagged , , , , , , , , , , ,

Cranberry Bliss Creme

Cranberries always make me think of Christmas, because that’s usually when I cook with them.  I have a lovely cranberry chocolate chip bread that is one of my seasonal favorites.  But that post is for another day.  Fresh cranberries are actually available all winter and you can get frozen ones year round (which could easily be substituted in this recipe). I love those tangy little things so I’m trying to take advantage of them a little more often.

This recipe was actually called Cranberry Curd, but whenever I hear the word “curd” my gag reflex immediately reacts.  Not a big fan of curds of any kind.  They make me think of things that are sour and gross.  Which admittedly, is not always the case.  But seriously, I never even knew what a curd was in this context.  I’ve heard of lemon curd but I always avoided it, picturing some cottage cheese-infested lemony concoction.  I was wrong.  A curd is simply a creamy fruit spread made with eggs.  It can be used in place of jam, on toast, on yogurt, for filling in cake…you get the idea.  It was sweet, tangy and wonderful!

Just use instead of jam. I especially liked it on sourdough.  Yum!

Just use instead of jam. I especially liked it on sourdough. Yum!

I made up a bunch of this during the holidays.  It was the perfect item to finish off a gift basket, present to a hostess, or offer as a token gift or thank you.  And we managed to keep and eat quite a bit of it ourselves.  I loved it on toast, but my favorite way to eat it was swirled into greek yogurt.

This is how most of mine ended up.  Swirled into thick plain or honey greek yogurt. Delicious and healthy too!

This is how most of mine ended up. Swirled into thick plain or honey greek yogurt. Delicious and healthy too!

I packaged it in small jam jars, which were great to put in the freezer and take out as needed.  The only drawback to this particular item is that it doesn’t last long!  With an expiration date of 2 weeks or so, you can’t stash it in the fridge and forget about it.  So cook some, and eat up!

Jars of Bliss to give out.  And a few to keep for myself.

Jars of Bliss to give out. And a few to keep for myself.

Cranberry Bliss Creme
(from Cooking Light.  Recipe makes about 2 1/2 cups, but can be easily doubled.  Allow a little extra time for the curd to thicken)

1/2 cup water
2 tbsp. fresh lemon juice
1 (12 oz) package of fresh cranberries
2/3 cup granulated sugar
1/4 cup packed brown sugar
2 tbsp. unsalted butter, softened
2 large egg yoks
1 large egg
1 1/2 tsp. cornstarch
1/8 tsp. salt
1 tbsp. Grand Marnier (optional)

Combine water, lemon juice and cranberries in a medium saucepan.  Bring to a boil.  Reduce heat and simmer 5 minutes or until cranberries pop.  Place cranberry mixture in a blender or food processor.  Process until smooth.  Strain through a fine sieve over a bowl and discard solids.

Combine sugars and butter in a bowl.  Beat with a mixer at medium speed until well combined.  Add egg yolks and egg, 1 at a time, beating well after each addition.  Stir in cranberry mixture, cornstarch, and salt.  Place mixture in the top of a double boiler.  Cook over simmering water until a thermometer registers 160˚ and mixture thickens (about 10 minutes), stirring frequently.  Remove from heat, let stand 5 minutes.  Stir in liqueur.  Cover and refrigerate.  Use within 2 weeks.

Perfect paired with something savory like Individual Mushroom Quiche.

Perfect paired with something savory like Individual Mushroom & Feta Quiche.

Tagged , , , , , , , , , , ,

Brussels Sprouts You’ll Actually Want to Eat

To anyone who tells me they hate brussels sprouts I usually reply with the same answer:  you’re not cooking them right.  Most of these people have had the great displeasure of eating grayish soggy lumps of previously frozen sprouts that have been boiled to death.  And I could not agree more with their whole-hearted YUCK!

I have two ways I generally cook brussels sprouts and both are absolutely delicious.  One is a light saute and steam.  The other, and by far my favorite, is to roast them just like french fries.  This is also the way that is easiest, and they can cook up while you make something wonderful to go with them.  The result?  Firm sprouts with crispy edges, lightly caramelized and flavorful.  If you ask my son Luke what vegetable he wants for dinner, this is usually what he will choose.

Brussels sprouts that your kids (and you!) will actually want to eat.

Brussels sprouts that your kids (and you!) will actually want to eat.

Roasted Brussels Sprouts

1-2 pounds fresh brussels sprouts
2 tbsp. olive oil
1 clove garlic, minced
A pinch of crushed red pepper
Sea salt & fresh ground pepper

Preheat oven to 400˚. Trim the ends off the sprouts and cut them in half.  Toss in a bowl with olive oil, garlic and salt & pepper.

Getting ready to roast.

Getting ready to roast.

Spread out on a baking sheet.  Bake for 20-30 minutes, stirring once mid-way through.  Sprouts are done when they are a little brown on the edges and tender to the bite.

Roasted Brussels Sprouts

Roasted Brussels Sprouts

Tagged , , , , , ,

Cheesy Cauliflower Bake

I’m always on the lookout for interesting side dishes.  Anything to keep dinner fun, right?  I came across a recipe for Twice-Baked Cauliflower on Pinterest.  I believe it was called that because it’s reminiscent of twice-baked potatoes, but you don’t actually bake the cauliflower twice so that title is a tiny bit misleading.  I originally saw this touted as a “healthier” substitute for the potato dish, but seriously, with all the cream cheese, cheese and sour cream in it, I don’t think I can call this a healthy recipe and keep a straight face.  It is lower carb, I’ll give them that.  I just made it because I like cauliflower.  And cheese.

You could make this a little lighter by using the lower fat versions of the dairy products (don’t use the fat-free products, they do weird things when they are cooked).  I don’t personally care for the lower fat versions (and I don’t really think they are any better for you).  I prefer to use the full fat stuff but I use a little less than the original recipe calls for.  In fact, I could probably cut it back even more than I did here.

This was a huge hit with my kids.  True, they like their veggies, but I’m betting even veggie haters will like this one.  It’s a pile of cheesy goodness.  I don’t think anyone will actually be fooled into thinking it’s potatoes, but they might change their minds about liking cauliflower.

I paired this with my Apple-icious Pork Chops and the sweet and salty combo was amazing.  I highly recommend it.

Cheesy Cauliflower Bake

Cheesy Cauliflower Bake

Cheesy Cauliflower Bake

1 large head of cauliflower
4 oz. cream cheese
1/3 cup sour cream
1/4 cup shredded parmesan
1/4 cup green onions
1/2 tsp. black pepper
6 strips of bacon
1/3 cup cheddar cheese

Preheat oven to 350˚.  Chop up the cauliflower and boil until tender.  While it is boiling, cook the bacon in a skillet until crisp and drain on paper towels.  Drain the cauliflower and mash with a potato masher.  I left quite a few chunks for texture.  Add cream cheese, sour cream, parmesan, green onions and pepper.  Mash or stir together until well combined.  Add 2/3 of the bacon and stir in.  Spray a small baking dish with cooking spray.  Spread cauliflower mixture in the dish.  Sprinkle with the remaining bacon and the cheddar cheese.  Cover with foil and bake for 20 minutes.  Uncover and bake another 10 minutes.  Serve hot.  Makes 4-6 servings.

Perfect on the side of just about anything!

Perfect on the side of just about anything!

Tagged , , , , , , , , , ,

Apple-icious Pork Chops

I saw a post from my favorite fruit stand the other day, telling me the Honeycrisp apple season was just about over for the year.  How sad!  I immediately ran down and bought a bunch.  …And now I’m trying to eat them all before they go bad.

To remember them, I immortalized one in paint.  Because if you can’t eat them, you may as well paint them.

Apple

I always enjoy pork and fruit together.  Something about the blending of those flavors just makes me happy.  These pork chops are such a great quickie meal for weeknights but fancy enough you could serve them to company.

porkchopsandapples

Apple-icious Pork Chops

4 pork chops (I usually use the boneless loin chops, but any will work)
Salt & pepper
1/4 tsp. sage
1 apple, peeled and sliced
1/3 cup red onion, chopped
2 tsp. butter
1 tbsp. brown sugar
1/8 tsp. cinnamon

Rub pork chops with salt, pepper and sage on both sides.  Drizzle a little olive oil in a pan.  Pan-fry chops 3-4 minutes on each side or until cooked through (thinner chops may not need quite as long, thicker chops might need a little longer).  Remove from pan.  Add onion to the pan and cook 1-2 minutes.  Add apples and butter.  Saute one minute or so.  Add brown sugar and cinnamon.  Saute another minute, until mixture is well combined and apples are just barely tender.  Pour apple mixture over chops and serve immediately.  Makes 4 servings.

Tagged , , , , , , , , , , , ,

A Studly Spud

Normally I keep potatoes firmly in side dish territory.  They are one of my favorite foods but rarely do the get the whole spotlight at any meal.  However, last night I found myself with several large leftover baked potatoes and a tired, lazy attitude.  I peeked in my fridge and they looked just like dinner to me.  Turns out if you pile some good stuff on top, you really don’t need anything else!

A studly spud.  All dressed up and ready to eat!

A studly spud. All dressed up and ready to eat!

Studly Spuds
For each potato:

Large russet potato
2 strips bacon
1/4 cup chopped red onion
1/2 cup grape tomatoes, cut in half
1-2 tsp. butter
Salt & pepper
Greek yogurt for topping

Poke each potato several times with a knife or fork and bake at 375˚ for an hour or so until tender.  Turn off oven and leave them sitting in there so they stay hot while you cook the topping.  In a skillet, cook bacon until crisp.  Remove from pan and drain on a paper towel.  Discard grease.  Add onion to the pan and cook for 1-2 minutes.  Add tomatoes and butter and cook and stir 1-2 minutes more.  Crumble bacon back into the mixture. Add a pinch of salt & pepper and stir to combine.

Slice the top of the baked potato down the center.  Fluff insides with a fork.  Pour bacon/tomato mixture over the top.  Add a dollop of plain greek yogurt or sour cream to the top if desired.

Baked potatoes to die for.  A little greek yogurt on top finished it off perfectly!

Baked potatoes to die for. A little greek yogurt on top finished it off perfectly!

Tagged , , , , , , , , ,